Configuring Authentise Root CA on Windows
This page contains instructions for installing the Authentise Root Certificate Authority on windows. You only need to follow these instructions if you are connection to a locally installed 3DIAX instance where your own internal IT department has not generated the SSL certificates. If that is not the case, or if you are unsure whether or not that is the case, please don’t follow these instructions and instead contact Authentise Support (support@authentise.com) with any questions you have.
First you will need to download the Authentise Root Certificate from here:
You should save this file to a well-known location, like Downloads
Next you need to up the Manage user certificates tool. You can find it by typing in certificate in your start menu. You can also open it through the Control Panel.

Next select Trusted Root Certificate Authorities

Then select the menu option under Action -> All Tasks -> Import...

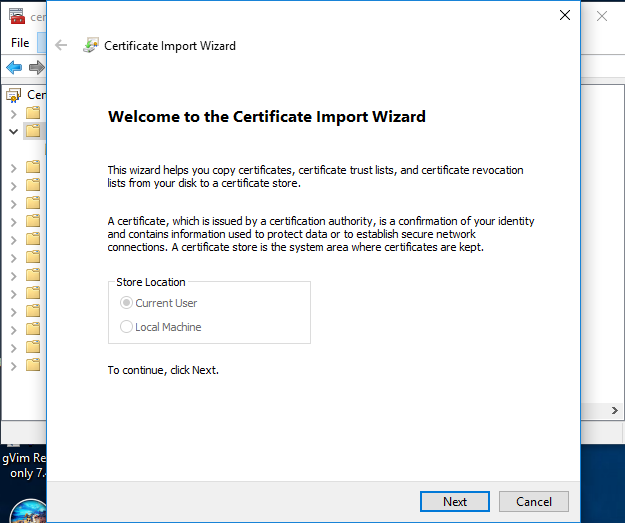
You will then see the Certificate Import Wizard. It will only allow you to install certificates for the current user rather than the entire machine because we did not run the program as Administrator. That’s fine, the current user will do, but you will need to remember to use the same user every time you connect to 3DIAX on this system, or you’ll need to follow these steps per-user
Next you should select the location of the file you downloaded in our first step, Downloads\authentise-root-ca.pem.cer

After you click Next you should leave the default import behavior, which is to place the certificate in the Trusted Root Certification Authorities store

After you click Next you’ll see a summary of what should occurr. It should look like this:

Now click Finish. You will see a warning dialog of what is about to happen in your certificate store. It should look like this:
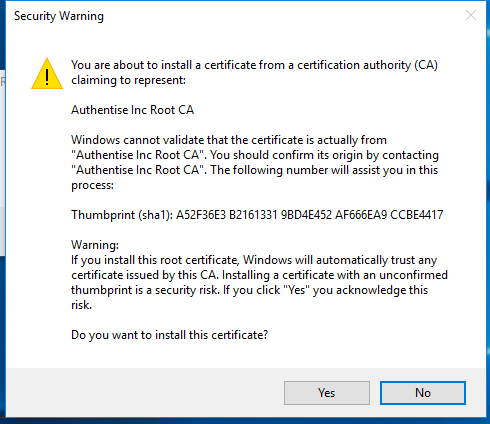
Click Yes. You’ll then see a dialog box confirming that the import was successful.
At this point the certificate is installed. Any common browser should honor the certificate including Internet Explorer, Google Chrome and Mozilla Firefox. If your browser was running at the time of import you will need to restart your browser for the changes to take effect